Effortless AI Image Generation with Midjourney in 5 Steps
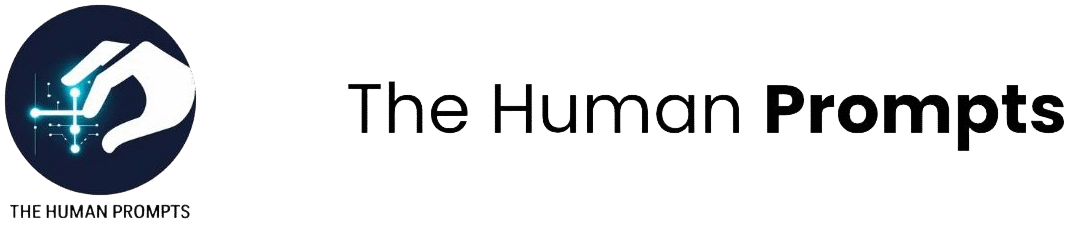
Why AI Image Generation is a Game-Changer for Creativity
Have you ever had a vivid image in your mind that you wished you could bring to life, but lacked the traditional artistic skills to do so? You’re not alone. A recent report showed that the market for generative AI art is expected to grow by over 34% annually, proving that millions are turning to new tools to unlock their creative potential. The world of AI image generation with Midjourney is not about replacing artists; it’s about empowering everyone to become a creator. This guide will show you exactly how to use Midjourney, even if you’re a complete beginner, transforming your ideas into stunning visual art.
Getting Started: Your First 5 Steps to AI Image Generation with Midjourney
Unlike many apps, Midjourney operates almost exclusively within Discord. This might seem strange, but think of it as a creative studio. Here’s how to begin your journey into AI image generation with Midjourney.
Step 1: Joining the Midjourney Server on Discord
First, you’ll need a Discord account. Once you have one, your gateway to Midjourney is an invitation. Go to the Midjourney website and click « Join the Beta. » This will open Discord and allow you to join their official server. You’ve just stepped into the studio.
Step 2: Finding a « Newbies » Channel
The Midjourney server is massive. Look for channels on the left-hand sidebar named newbies or general-. These are public workshops where you can create your first images.
Step 3: Using the /imagine Command
To start, go to a ‘newbies’ channel, type a slash (/) in the message box, and choose ‘imagine’ from the command list. You’ll see the word prompt appear. This is how you tell the Midjourney bot you’re ready to give it instructions.
Step 4: Writing Your First Text-to-Image Prompt
This is where your words become art. After the prompt tag, write a short description of what you want to see. Don’t overthink it for your first try. Let’s start simple.
- Your first prompt could be: a cute robot drinking coffee, cartoon style
Press Enter. In about 60 seconds, the bot will generate four unique images. Congratulations, you’ve just mastered the core mechanic of AI image generation with Midjourney.
Step 5: Upscaling and Creating Variations
Below your grid of four images (labeled 1-4, top-left to bottom-right), you’ll see two rows of buttons:
Below your grid of four images, you’ll see « U » and « V » buttons.
- U buttons (U1-U4): These « Upscale » the selected image, making it larger and more detailed.
- V buttons (V1-V4): These create four new « Variations » based on the image you liked.
Click « U1 » to get a high-resolution version of your first image, which you can then save.
The Art of the Prompt: 3 Core Elements for Better AI Image Generation with Midjourney
Your first image was just the beginning. The true power of this tool lies in crafting better text-to-image prompts. Mastering AI image generation with Midjourney involves understanding three key elements.
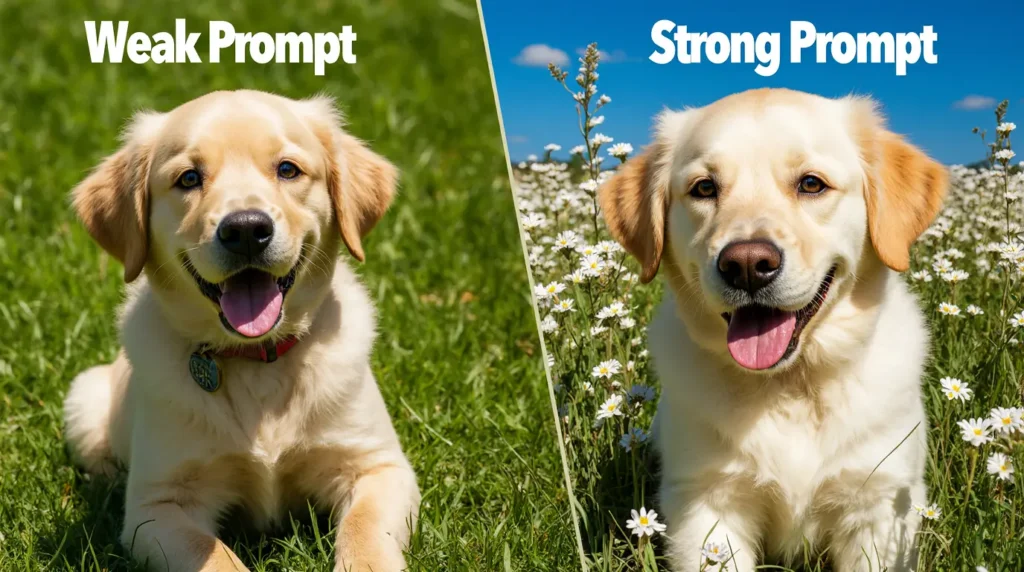
Element 1: The Subject – Be Specific
Being vague gets you generic results. Being specific gets you incredible results.
- Instead of: a dog
- Try this: a joyful golden retriever puppy, seated among wildflowers, gazing upward with a curious expression.
Element 2: The Style – Define Your Aesthetic
Do you want a photo or a painting? A cartoon or a sculpture? Define the style.
- Try adding these style keywords to your prompt:
- photorealistic, 8k, cinematic lighting (For photos)
- oil painting, impressionistic, textured brush strokes (For paintings)
- line art, minimalist, vector logo (For graphics)
- anime style, Studio Ghibli inspired (For illustrations)
Element 3: The Technicals – Lighting and Composition
Think of the prompt as directing a virtual camera to frame your ideal shot.
- Try adding these technical keywords:
- golden hour lighting, dramatic shadows
- wide-angle shot, from a low angle
- macro photography, shallow depth of field
- Putting it all together, a powerful prompt looks like this: a happy golden retriever puppy, sitting in a field of wildflowers, looking up with curiosity, photorealistic, cinematic lighting, golden hour, wide-angle shot
Avoid These Mistakes When Generating AI Images in Midjourney
As a beginner, you’ll learn fast, but you can learn even faster by avoiding these common pitfalls when starting with AI image generation with Midjourney.
Mistake 1: Being Too Vague
The most common mistake is being too brief. A spaceship is a weak prompt. Good prompts are rich in detail. Think: ‘sleek, metallic spaceship with retro curves, cruising through a neon-pink nebula — cinematic, hyperreal, 4K. Always add more detail.
Mistake 2: Forgetting to Experiment with Styles
Don’t get stuck in one aesthetic. If your photorealistic prompts aren’t working, try describing the same subject but add in the style of a watercolor painting. Experimentation is key to mastering the tool.
Frequently Asked Questions (FAQ Section)
Is Midjourney free to use?
As of 2025, Midjourney no longer offers a free trial due to high demand. Image generation is only available with a paid subscription to Midjourney. The plans are tier-based, offering a certain number of image generations per month.
Can I use the images I create for commercial purposes?
A paid plan typically grants you commercial usage rights for the images you generate. However, it’s always best to check Midjourney’s latest Terms of Service for the most up-to-date information, as policies can change.
What’s the difference between Midjourney and other tools like DALL-E 3?
The biggest difference is often in the aesthetic. Midjourney is widely regarded as producing more artistic, painterly, and dramatic images by default. DALL-E 3, integrated into tools like ChatGPT, is often praised for its ability to follow complex instructions very literally and is great for more illustrative or graphic styles.


Un commentaire
Les commentaires sont fermés.